
The Bulletin Times
Where I’ve Been / Where I’m Going, Pt. 2
[11/13/2025]
As we reach midterm season, I want to take the time to reflect on the many things that have happened and are happening in my life!
University has been very… interesting! I say that in a positive light. I have been keeping a half-diary half-scrapbook to document my experience. While I won’t be sharing the contents of that nor specifics of my daily life, I would like to share some general and vague details.
The friends that I’ve made thus far are amazing people, and if any of you happen to read this, I think you’re awesome :). It’s really cool to exist in a place of so many different perspectives, I think I learn something new about other student’s cultures and life philosophies every day! Alongside academics, in which I’ve learned SO much about the multitude of subjects that I am taking classes in, I have also learned about people.
I must admit, I lucked out with my roommates. For housing, I picked random selection, being that I wouldn’t have known anybody to select as a roommate in the first place. The people I was placed with are great to live with, and I appreciate all of them! It is great to live with everybody in an environment of respect and accountability. I mess up (the dishes in the sink have been “soaking” for quite some time…) and I am deeply grateful that I can take accountability for my actions and be allowed to learn from those mistakes. I was quite nervous to live with other people being that I am an only child, but this experience has proved to be incredibly positive and a boon to my personal growth. While there have been periods of drama and discomfort, the opportunity to be here and to learn is amazing, and my experience as a whole has been a net positive.
Now, to address the elephant in the room – I have been severely neglecting this website. To be honest, the university experience has been eating up a lot of my time. Given that I am in a place where I have responsibility to complete assignments, manage my time with much more scrutiny, and manage an apartment, the site has been placed on the backburner. Life is busy! Living away from my family for the first time has a giant learning curve, and I’m still figuring out some things. Regardless, I apologize for the broken promises of site updates and the lack of engagement I’ve had with this community. Today forward, I will make a conscious effort to work on this site as well as keep up with all of you! I appreciate you!

Where I’ve Been / Where I’m Going
[08/02/2025]
It’s summer! I got my Associates and am now heading to university. I switched my major to computer science. Unfortunately most of my credits will not transfer as business admin. has little to do with comp sci, but at this point I do not care. This is a subject that I envision myself having a satisfying career in, if it takes me an extra year to complete the program then so be it.
My original thought was that with the extra time gained during the summer, I could flesh out this site more, study a new programming language, brush up on my math skills, etc. However, preparing for the transition to university has been eating up a lot of my time and energy. Preparing for living on campus, filling out all of the needed forms, going to the multiple orientations, and planning my degree are all taking up a lot of room in my brain.
I’ve been slowly picking away at different pages for this site. I am at the point where most of the page’s structures are completely finished, they just need to be filled with content (especially the shrine pages). I also have been revising some of the code in established pages.
In the meanwhile, I’ve been putting together a development portfolio for myself. It will just serve as a framework for now, as I feel I don’t have any worthwhile projects just yet. As I learn and make more things it will be updated. The job market and employment prospects for my desired career paths are not looking excellent at the moment, but I remain hopeful that if I showcase my talents well enough I will get hired (or at least an internship).
In all, things are looking up.

Keyboard Adventures / Review
[09/15/2024]
I recently built a new mechanical keyboard! For those who are not familiar with what the following keyboard jargon (PCB, switches, membrane, etc.) means, I will explain below before delving into the build’s issues and timeline.
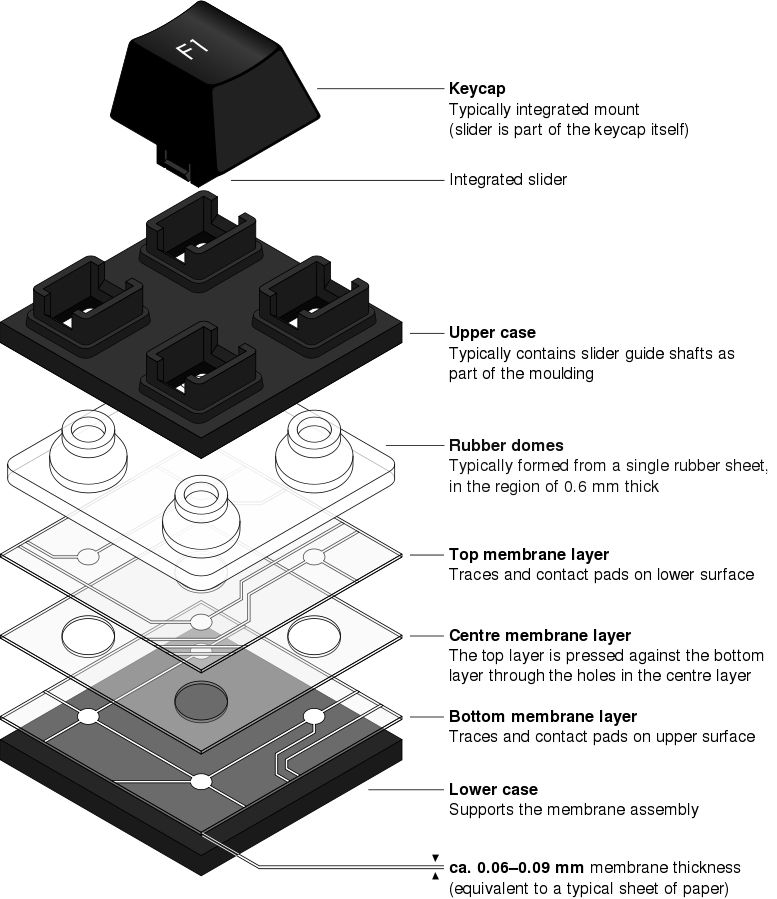
At their core, all keyboards work the same way – you press a key, and it sends a signal to your computer which is then decoded and turned into a letter or command. However, there are two main methods of making this happen: membrane keyboards, and mechanical keyboards.
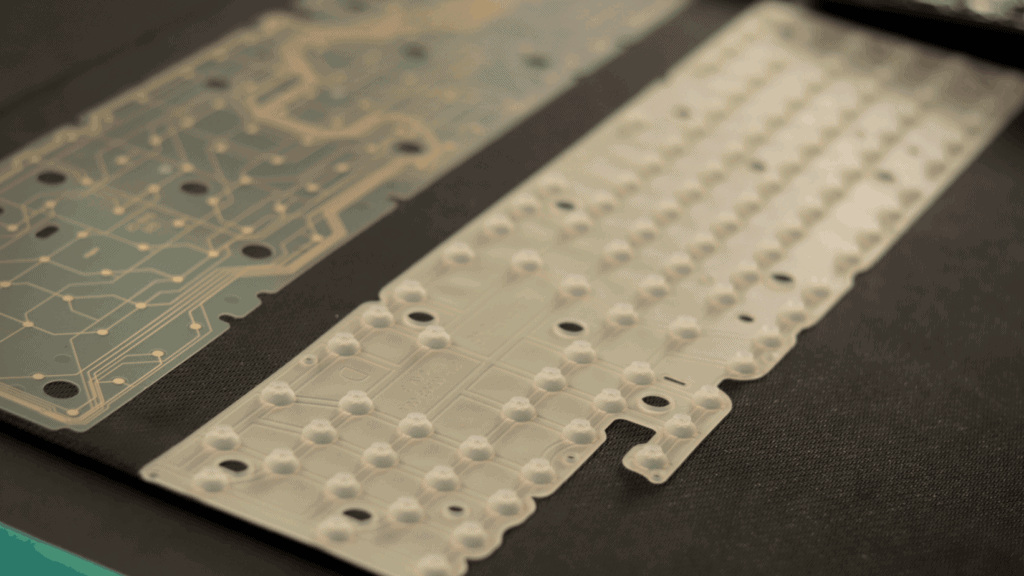
On a membrane keyboard, all of the keys are connected to a rubber pad. When you press on a key, the pad gets pushed down to touch a circuit board. The part of the circuit board that gets touched determines which signal is sent to the computer. When pressed, the key can feel somewhat squishy.
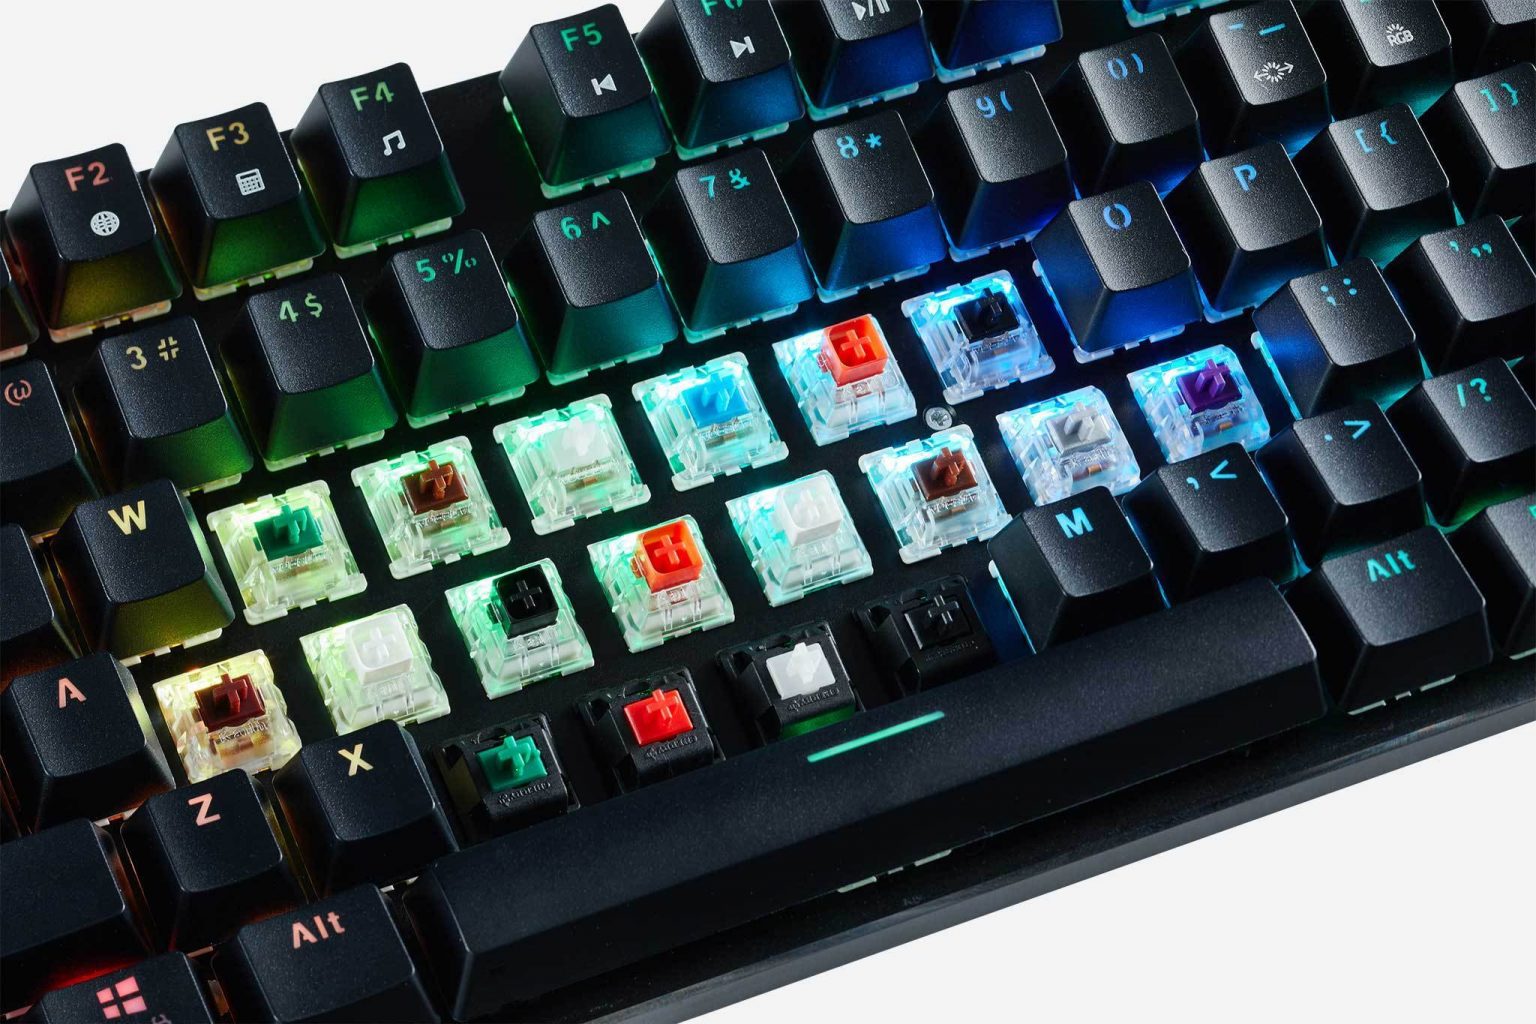
On the other hand, mechanical keyboards have a dedicated “switch” assigned to each section of a PCB (or “Printed Circuit Board”) to send signals to your computer. The feel of pressing on the key entirely depends on what type of switch is installed, it can be smooth, bumpy, or clicky. You can read in-depth about keyboard switches here. Mechanical keyboards can be purchased pre-built and pre-flashed, meaning that you can plug it in and immediately use it, or they can be purchased as parts and DIY-ed.

The advantage of DIY mechanical keyboards over pre-built and membrane keyboards is that if something malfunctions or breaks (let's say, the letter “H” will stop working all of a sudden), the keyboard can be fixed and be fully functional again. On a mechanical keyboard, you would have options on how to fix the issue, including simply replacing the broken parts. You also have options to customize the appearance of the keyboard, and they are easier to clean than membrane keyboards if gunk gets trapped in between a key.
If the letter “H” stops working on a membrane keyboard, the best option would be to throw the entire keyboard away and buy a new one. While for some, the convenience of plug-and-play keyboards trumps this potential outcome, I personally find it very wasteful. On average, a mechanical keyboard is rated to last anywhere from 20 million to 100 million key presses, while membrane keyboards typically only last five to ten million key presses. I’ve had to throw away multiple membrane keyboards simply due to heavy use (looking at you, Corsair!) Having to do this multiple times convinced me to switch to mechanical keyboards.
This is not to say that DIY mechanical keyboards are without their downsides. The cons to DIY mechanical keyboards are time, money, and patience. As I will later discuss, building mechanical keyboards can be incredibly frustrating, expensive, and time-consuming. They are frustrating to troubleshoot when something inevitably goes wrong or breaks, have an incredibly expensive barrier to entry, and take time and effort to learn to build as they are the antithesis of plug-and-play.
To get around these issues and still reap some of the benefits of a mechanical keyboard, you can buy pre-built. However, that puts you in the same spot as a membrane keyboard. Because it is pre-built, that usually means that repair is more difficult to achieve (but not impossible!) if something were to break, and it would be much more expensive to fully replace.
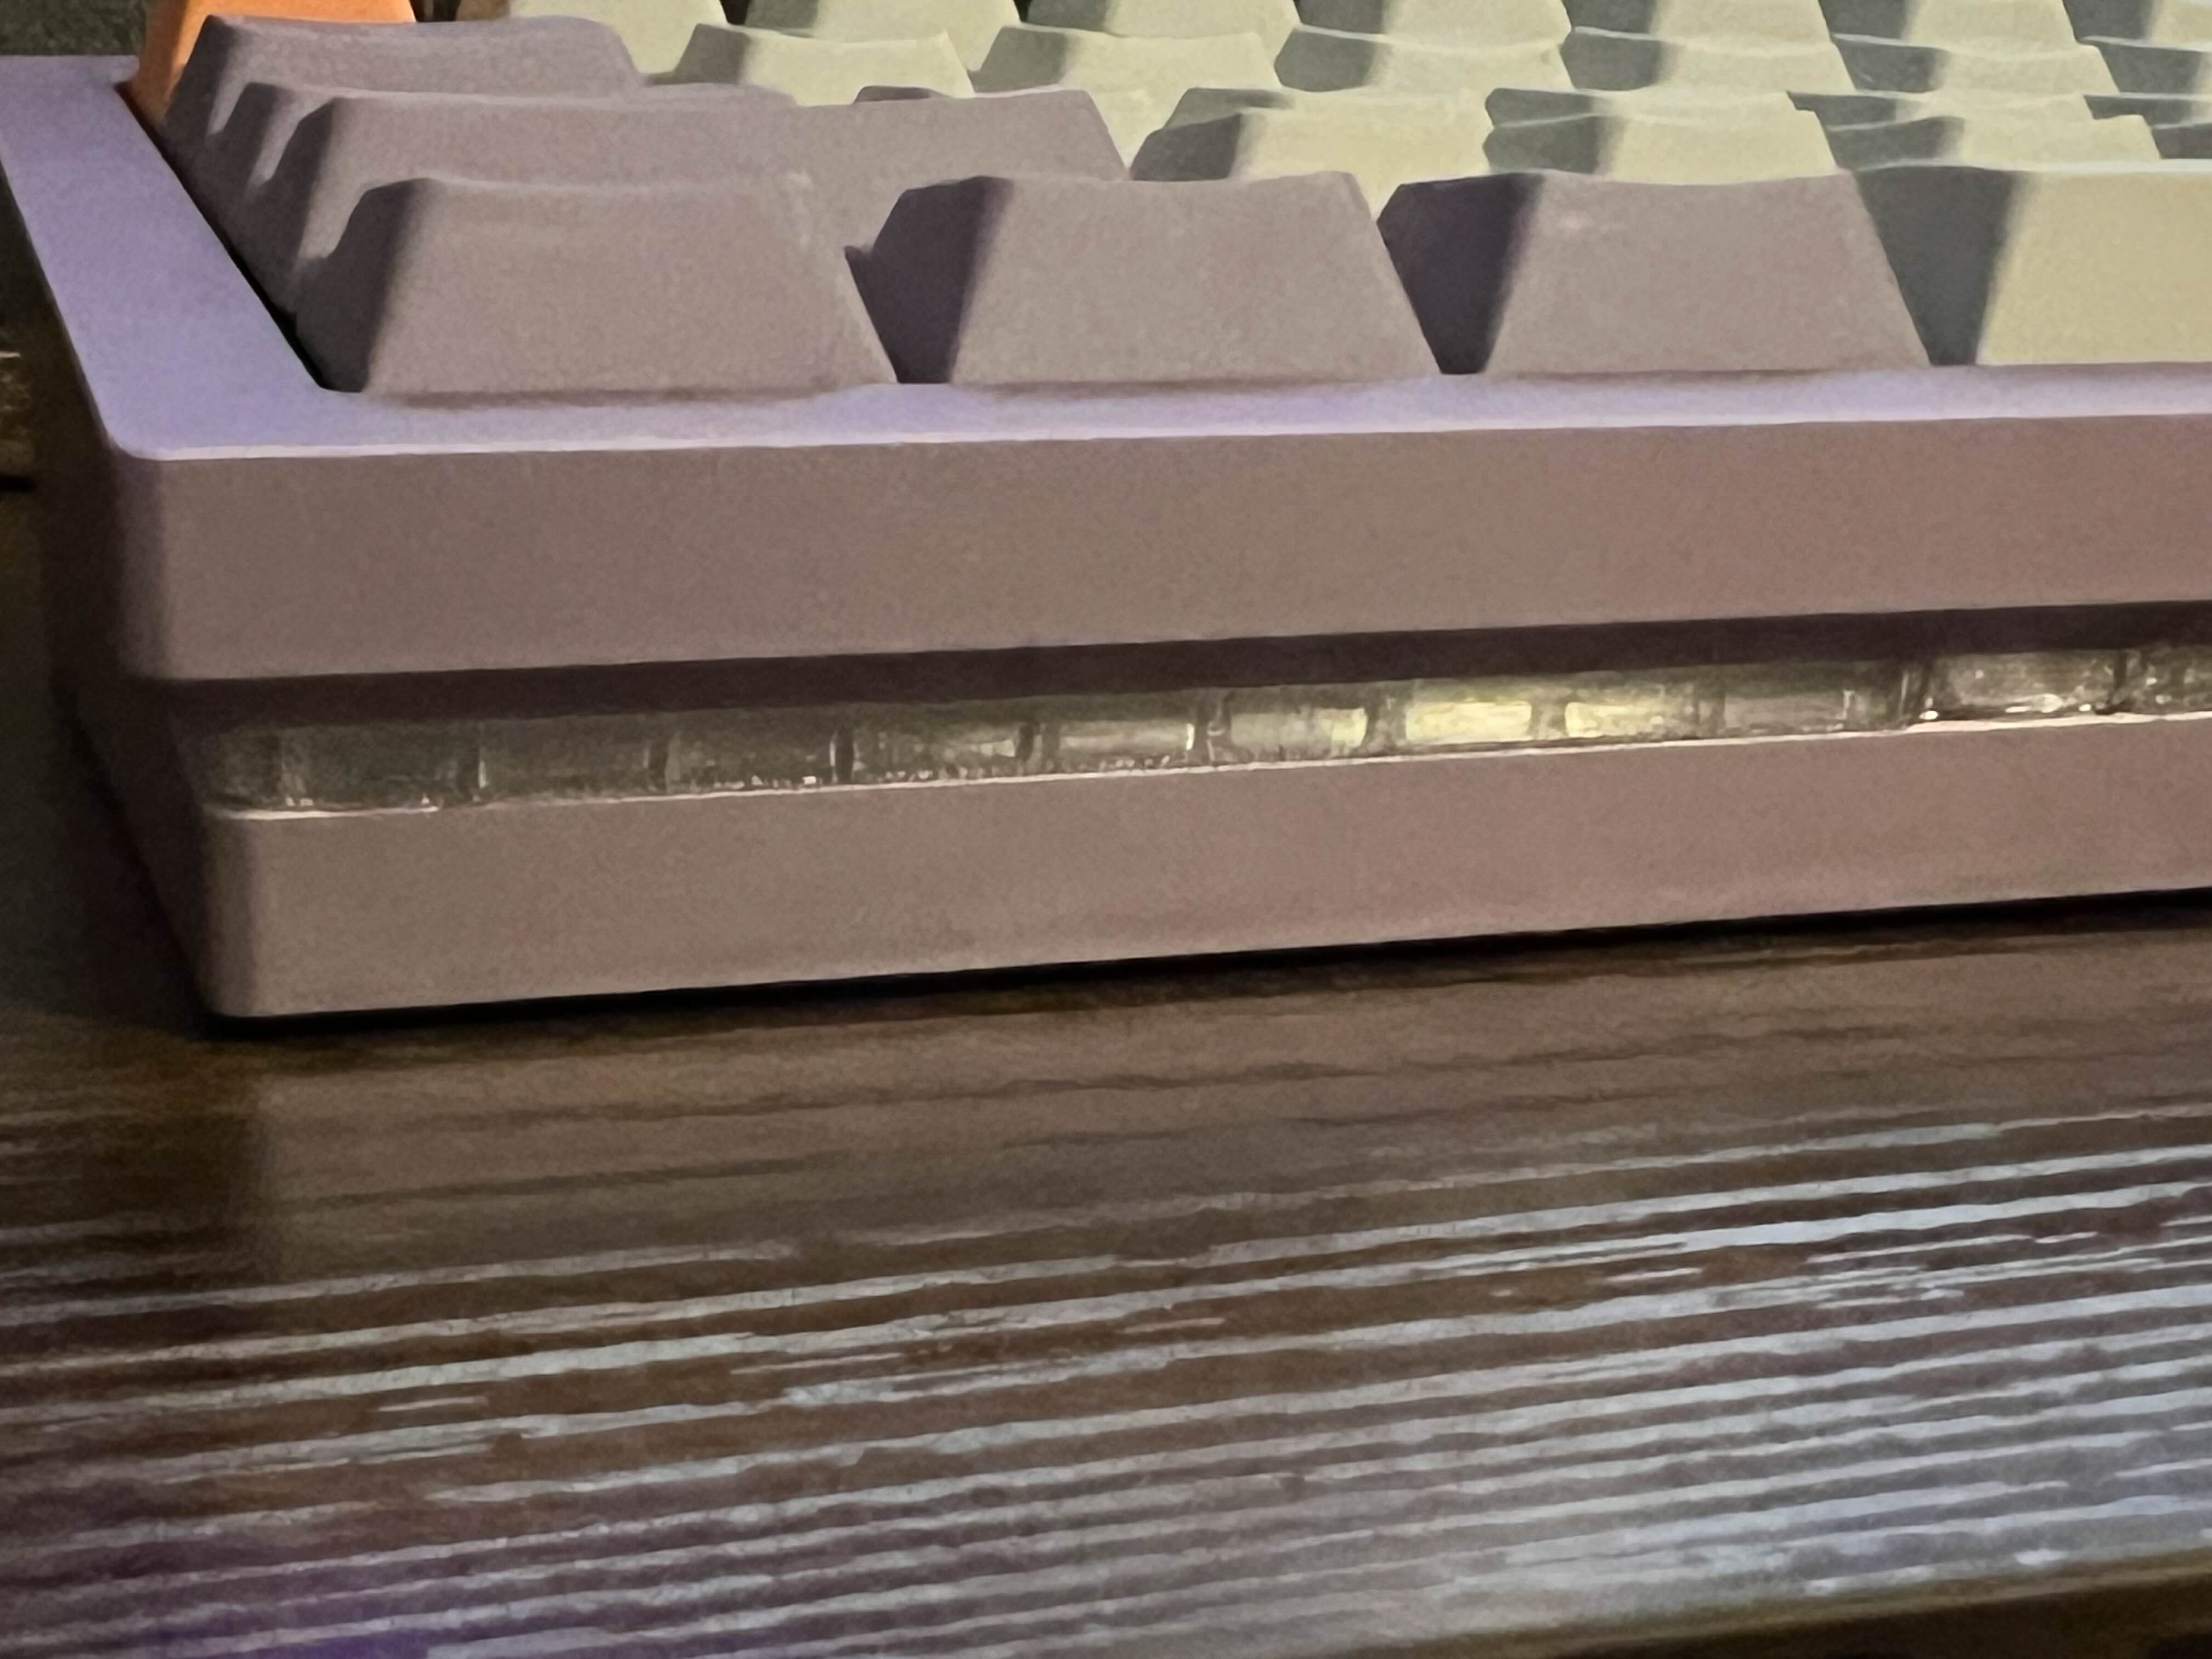
Now, onto the build timeline for my new mechanical keyboard! Pictured below is what the finished product looks like:
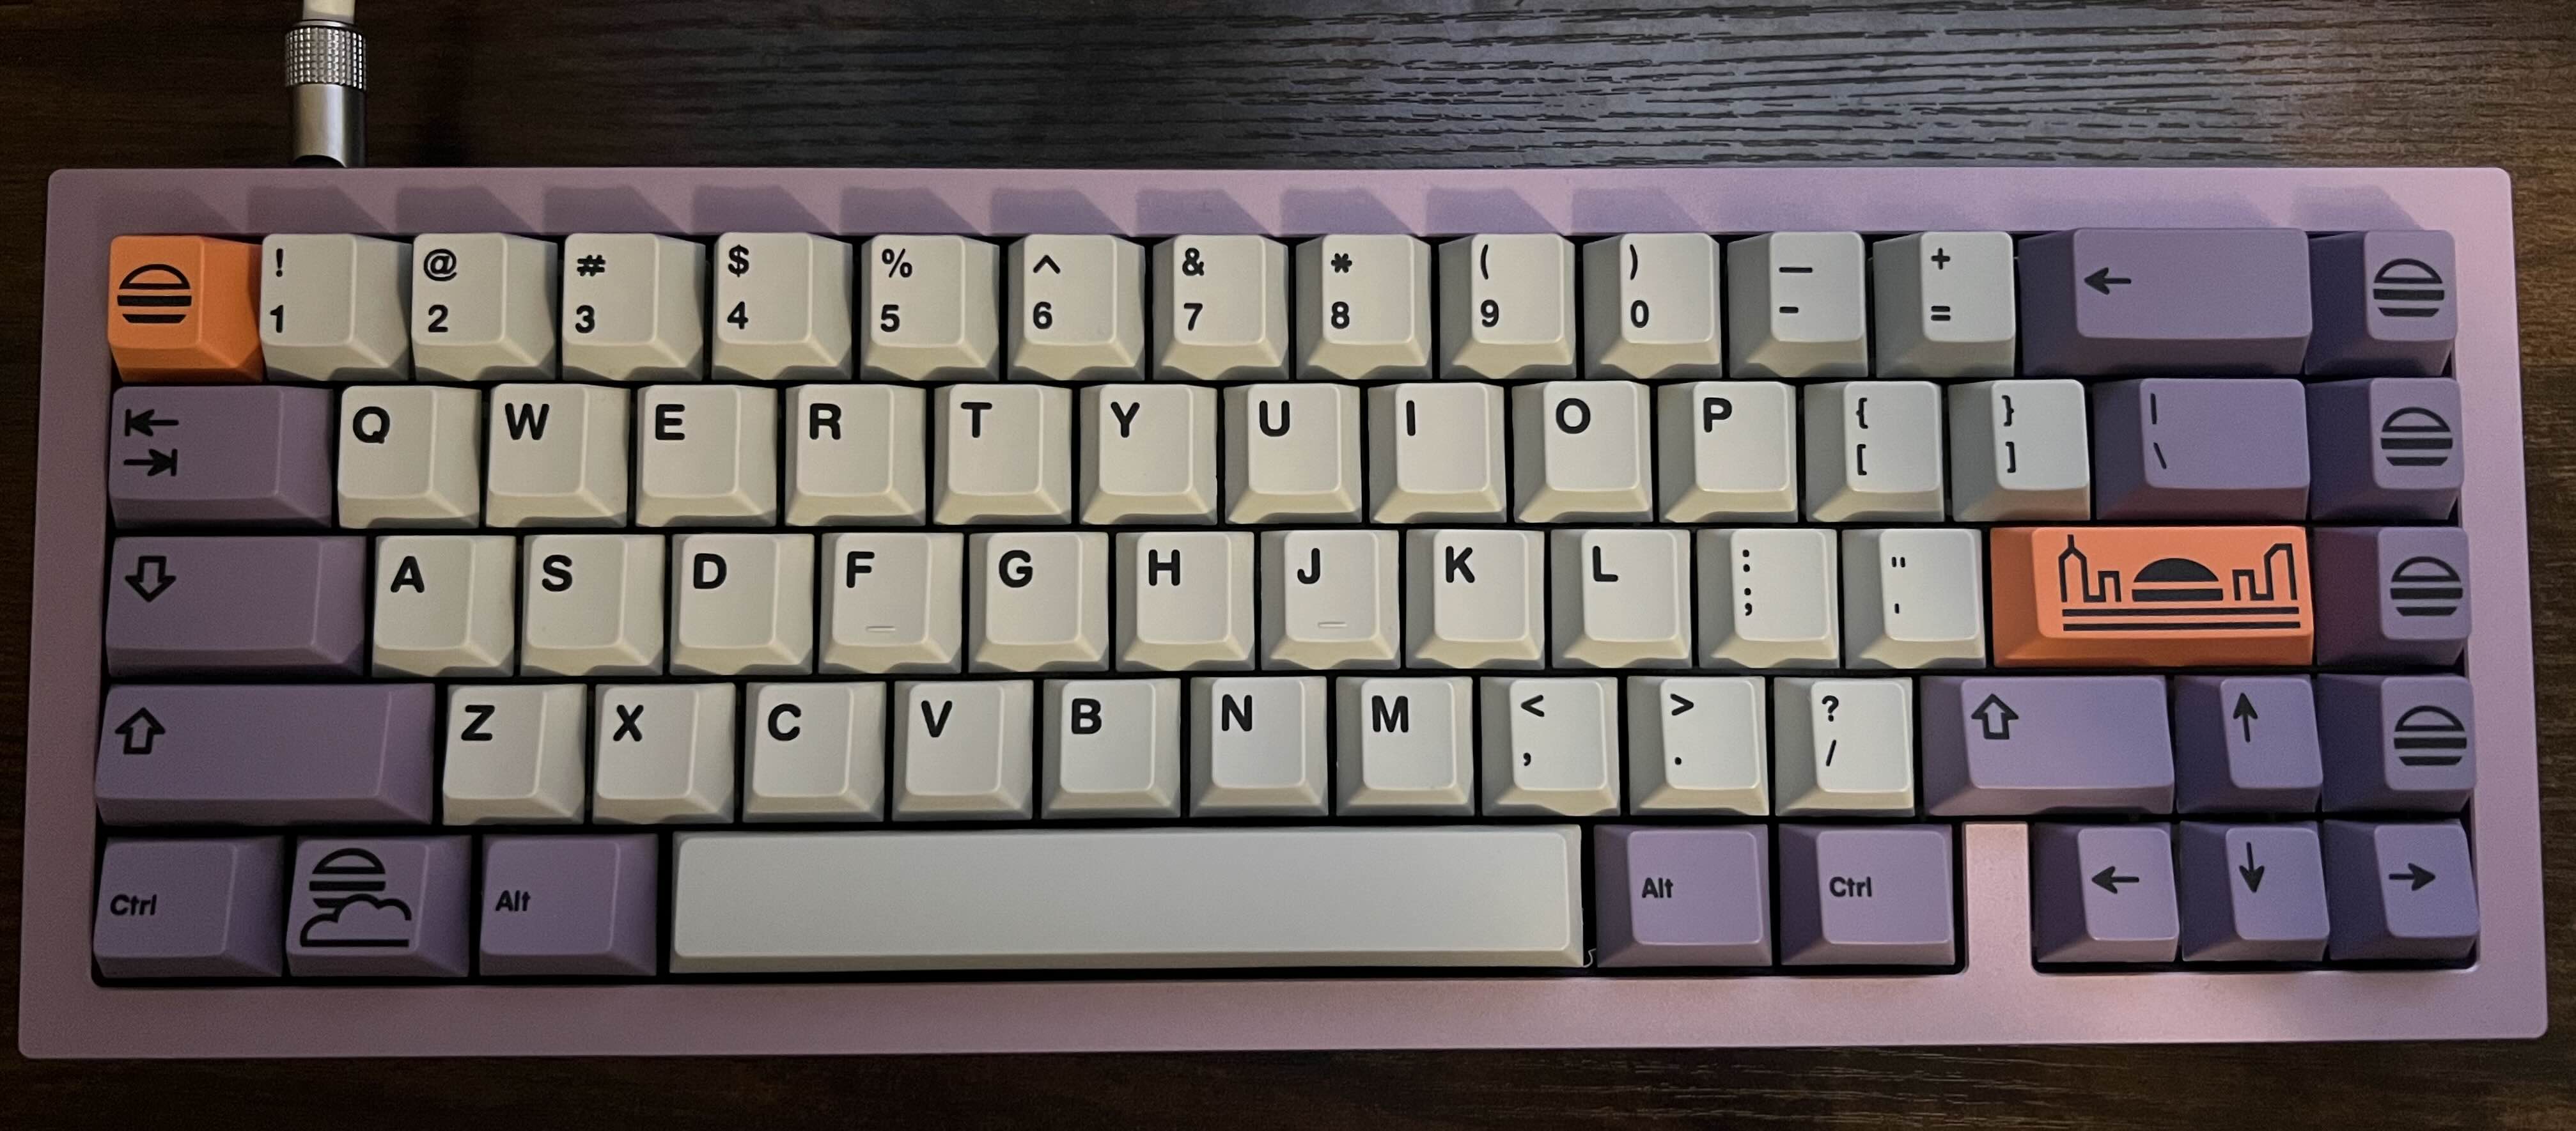

Building this keyboard was probably one of the most frustrating builds I’ve done so far. It was an entire saga getting it to be functional, including some additional DIY jerry-rigging that shouldn’t have been necessary. There were many issues with this build that I would say were either the result of deceit, or massive design flaws with the keyboard case itself. What do I mean by this? Well... it’s a long story.
On the website where I purchased the DIY kit, there was a drop-down menu option that for an extra $10 they would make the PCB hot-swappable. When choosing this option, I was under the impression that the PCB that was listed on the website would be modified to be hot-swappable. Instead, I discovered that the drop-down option completely replaced the PCB with another PCB of the same format (65%) that was hot-swappable. In short, I thought I purchased a Savage65 PCB with hot-swap modifications, but instead received a hot-swap Brutal V2 (two completely different PCBs).
This originally wasn’t an issue, as I understand that some PCBs simply do not come in hot-swap variations. I figured, if it was an option to buy with the kit, and it's the same format, then it must be compatible with the other parts. I was very wrong.
I ran into the first issue after fully testing and assembling the keyboard. When I plugged the keyboard into my computer, the keyboard would only power on around half of the time. This was especially strange because during testing, when the top plate was not screwed into the bottom case, the PCB would turn on 100% of the time and give no issues. After some tinkering, I discovered that the PCB that I received was not, in fact, compatible with the case I had purchased it with in the kit.
Although in technicality the PCB does fit in the case, there is no clearance between where the USB-C port sits and where the PCB’s hot-swap sockets are placed. Because of the tight fit, these two components were touching and short circuiting the keyboard. This is why it would inconsistently power on. To fix this, I designed and 3D printed some risers for the case that sat in between the top and bottom of the case. This way, the PCB and USB-C port were not touching and the board would consistently power on.
After going through all of this trouble, I plugged in the keyboard and went onto QMK’s keyboard testing app, just to be sure that everything was working correctly. Lo and behold, the caps lock key was not registering!

Wonderful.
At first, I assumed that because of all of the shorting the board went through, it had fried the hot-swap socket for the caps lock key. After some research and testing, though, I found out that the caps lock key was functional, but bound to “Fn”, the function key. Apparently, this is a default for the keyboard, which I don’t really understand because there are four additional media keys that could’ve been mapped to be Fn instead. But I digress.
This discovery, as annoying as it was at the time, came as somewhat of a relief. I was happy that the key’s socket wasn’t broken, as that would mean that I would have to solder to fix it. The fix for this issue is simple conceptually, but in practice is a major headache. I am not going to cover QMK simply because it frustrates me to no end, and in my opinion has very poor documentation for beginners and people who do not understand technical jargon. However, for re-mapping the keyboard, QMK is the best available option to do so.
Having to use QMK is not my biggest gripe with this keyboard, though. I am mainly upset that I had to go out of my way to get the keyboard to turn on without shorting. Through building this keyboard, it has become abundantly clear that this case is not compatible with the Brutal V2 hot-swap PCB. I feel empathy for those who may have purchased the same kit that I did, but do not have access to the resources that I do. Imagine you were a complete beginner to the keyboard hobby and wanted to build a keyboard that was quality and at a reasonable price. You purchase the keyboard kit with the $10 hot-swap upgrade, perhaps because you do not own a soldering iron and all of the materials needed. You receive your keyboard kit, build it according to the instructions to the letter, and it will not power on at all. To make matters worse, if you do not have access to 3D CAD software or a 3D printer (which, by the way, have incredibly steep learning curves), there would be no possible way to sufficiently fix this issue. You would be $300 in the hole, with nothing to show for it! It is almost as if you paid extra money to receive a product that was near guaranteed not to work due to compatibility issues.
It is beyond me why the company I purchased from has an option to include this PCB as an option for the Savage65 kit. The hopeful side in me is giving them the benefit of the doubt. Perhaps they simply did not realize that this issue is occurring, as the case does technically “fit”. The cynic in me thinks that this is just plain deceit on the part of the company. I believe that it is incredibly deceitful of them to list a hot-swap “upgrade” under the “Savage65 PCB Choice” category. One would think that an upgrade would entail modifying a Savage65 PCB to be hot-swap for additional cost, not replacing the advertised PCB with an entirely different, incompatible PCB.
It is a great shame that these issues occurred, as other than the shorting it was a relatively good build process (this cannot be said about many keyboard builds.) I believe that all of this frustration could have been prevented if the company were transparent about PCB compatibility for their different cases. If I had been made aware that the hot-swap PCB was not compatible with the case, I would’ve simply ordered the solder version and saved myself the headache and work of figuring out how to make the keyboard power on. The entire experience of building this keyboard was incredibly frustrating and time-consuming. If I had to rate my experience, it would be two stars out of five. I am not going to say that you should never buy from this company, because I am sure that had I received a compatible PCB the building experience would be excellent. Regardless, I now have a functional keyboard that I can use to create more code for this website, and for that I am grateful.

First Post!
[08/13/2024]
First post! Building this site has been a lot of trial and error, and there are still many bugs to fix, however I am proud of myself for at least putting something onto the page, lol. As for the pages of the site that are not built yet, I am planning to complete one aspect of the website every two or three weeks, and releasing on a monthly schedule. Releases will generally stick to this time frame, but may be shorter or longer due to factors like the difficulty or volume of creating said page. It is a long time in between updates, but I am a full-time student. Most of my attention will be going towards school work, but I am going to try to dedicate time to work on the site as much as I can!
My goals for this site are to:
- Make it so the entire page scales with the screen size, but keeps each element aligned the same as its original position. For now, I managed to make this happen by putting a grid within a container, which has a set size in px. It’s garbage, but the garbage will do!
- Make pages responsive. I do recognize that most of the pages are not responsive to layout changes, which is something that I am looking into solutions for. I am building this site on a 16:9 monitor, so on my end it looks fine, but for others some elements may be cut off, squashed, stretched, or misaligned. I have been struggling with aligning elements on my pages, especially since there are a lot of image elements.
- Clean up the mess that is written in my HTML and CSS. Optimizing the code should make for easier future updates. This is something that’s achieved through time spent learning HTML and CSS. The more I learn, the better my code will be structured.
- Learn JS. While I have some prior knowledge of HTML and CSS from a high school web design class (shout-out to Mrs. Hahn!) I have no idea what I am doing when it comes to JS. I would like to get a grasp on the basics, so I can at the very least clean up the Frankenstein-ed JS code in this site.
I have been writing the code for this website using a keyboard with broken arrow keys and number keys. Although they don’t typically seem super useful, coding without arrow keys to navigate between lines is a royal pain. I also cannot type the number six, and have been copying and pasting it from the Wikipedia article on Arabic numerals whenever needed. Being that this is the only keyboard that I have, it is concerning that key by key it is beginning to fail. Safe to say, a new board has been ordered. I somehow managed to get a full Savage65 kit from CannonKeys. It was on a clearance/bundle sale that included mystery switches and mystery keycaps, which should be enough to fill the entire board with. It was cheap enough for me to justify buying it instead of repairing my current keyboard’s PCB. I am just waiting for it to arrive in the mail! After I finish the build, I will share the results. I cannot promise that it will be aesthetically pleasing in its color scheme and be matching! However, it will be functional and that is all that matters to me as of now.
If you’re still reading, I would like to say thank you for visiting! If you found any bugs that weren’t already mentioned in this post, please let me know. See ya later!